VTY access-class accepts extended and named access lists
You could limit terminal access to a router with an access-class in line configuration command for a very long time (since, at least, IOS release 10.0). However, the access-class command only accepted standard access-lists, allowing you to restrict access solely based on source IP addresses. In the meantime, this feature quietly got upgraded to support extended access lists. In the IOS release 12.4, the command even accepts (undocumented !) named access lists.
These new features give you the ability to implement interesting policies, for example:
Disable the "more" prompt
If you want to disable the Cisco IOS more ... prompt (for example, when listing router's configuration with the show running command), set the terminal screen length to zero with the terminal length 0 exec-mode command. To change the terminal lenght permanently, use the length lines line configuration command, for example:
line console
 length 0
line vty 0 4
 length 0
Cisco IOS Login Enhancements
Cisco has in IOS release 12.3(4)T (integrated into 12.4) finally introduced features (long available in Unix and Windows) that slow down dictionary attacks on a router. On top of logging of login failures, you can also slow down the login process by delaying the router response after a login failure with the login delay seconds command.
On top of that, the you can configure the router to enter quiet mode after several login failures have been detected in specified timeframe with the login block-for seconds attempts tries within seconds configuration command.
CEF punted packets
The packets that cannot be CEF-switched in a box with CEF switching enabled are punted to the next switching level (fast switching or process switching). The incoming packets can be punted for a number of reasons, for example:
- If the destination is reachable over an interface that cannot use CEF-switching due to a feature not supported by CEF (for example, X.25 link), the packet has to be fast- or process-switched.
These destinations are easily discovered by inspecting the punt adjacencies.
CEF punt adjancency
In "border cases" you might find interesting CEF adjacencies in your CEF adjacency table (displayed with show ip cef adjacency). Most common one is the glean adjacency used for directly connected routes (this adjacency type is a placeholder that indicates the router it should perform the ARP table lookup and send the packet to directly connected neighbor). Discard, Drop, Noroute and Null adjacencies are obvious, the "weird" one is the Punt adjacency, which indicates that the router cannot CEF-switch the packet toward the destination (due to a feature being used that is not yet supported by CEF), thus the packet is punted to the next switching method (fast switching and ultimately process switching).
Reload the router from an interim privilege level
While you wouldn't usually want non-privileged user to reload a Cisco IOS-based router, you might also not appreciate the need to give the network operator level-15 access (which includes configuration privileges) just to reload the box. The solution is the privilege configuration command. To lower the privilege level of the reload command, configure privilege exec level desired-level reload.
Count the logging messages
I haven't figured out why I would need this particular IOS feature (IOS documentation says you can at least get a glimpse of what was happening before the logging buffer wrapped over), but it's such a cool one I simply have to mention it ... starting with release 12.2(8)T and 12.3, IOS can tabulate the occurence of each log message.
Per-Port CEF Load Balancing
In designs with very low number of IP hosts, no per-destination load-sharing algorithm will work adequately. Consider, for example, an extranet design where a large number of IP hosts are NAT-ed to a single IP address which then accesses a single remote server.
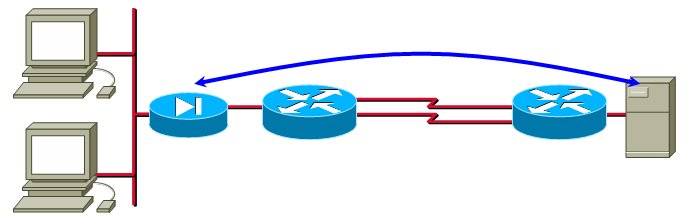
In this design, all the traffic flows between a single pair of IP addresses, making per-destination load-sharing unusable.
Improve the convergence of static routes
Have you ever experienced a long wait between the moment you've configured a static route and its appearance in the IP routing table? The reason might be that Cisco IOS by default adjusts static routes every 60 seconds. IOS release 12.0(29)S (integrated in 12.3(10) and 12.4) fixes this problem with the ip route static adjust-time seconds global configuration command.
Enhanced OSPF Adjacency Logging
The log-adjacency-changes OSPF configuration command was improved with the detail command that logs every step of OSPF adjacency establishment (sample printout below), making it a great troubleshooting tool.
%OSPF-5-ADJCHG: Process 1, Nbr 172.16.0.21 on Serial0/0/0.100 from DOWN to INIT, Received Hello
%OSPF-5-ADJCHG: Process 1, Nbr 172.16.0.21 on Serial0/0/0.100 from INIT to 2WAY, 2-Way Received
%OSPF-5-ADJCHG: Process 1, Nbr 172.16.0.21 on Serial0/0/0.100 from 2WAY to EXSTART, AdjOK?
%OSPF-5-ADJCHG: Process 1, Nbr 172.16.0.21 on Serial0/0/0.100 from EXSTART to EXCHANGE, Negotiation Done
%OSPF-5-ADJCHG: Process 1, Nbr 172.16.0.21 on Serial0/0/0.100 from EXCHANGE to LOADING, Exchange Done
%OSPF-5-ADJCHG: Process 1, Nbr 172.16.0.21 on Serial0/0/0.100 from LOADING to FULL, Loading Done